How to make a model of a solar system?
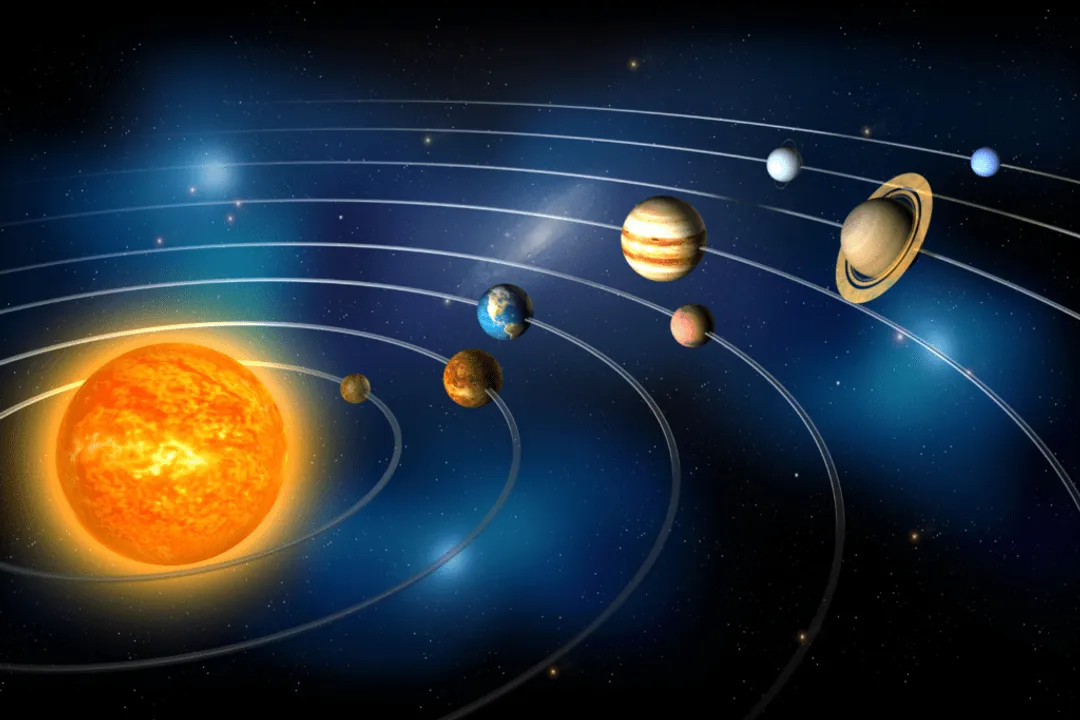
Making a model of our solar system is a classic science project, but achieving accuracy, particularly with scale, presents some fascinating hurdles. It is an exercise that quickly reveals the immense emptiness of space and the relative smallness of everything within it. [3][5] Before grabbing glue and Styrofoam, a crucial decision must be made: will the model represent the relative sizes of the planets, or will it attempt to represent the relative distances between them? Attempting both simultaneously, especially in a classroom or home setting, often proves impossible. [5][6]
# Planning Scale
The concept of scale is the defining factor for any successful solar system model. You are essentially choosing a ratio—how many meters or centimeters in your model equal one astronomical unit (AU) in space?[3] If you choose a scale factor that accurately represents the immense distances between the planets, your model will need an area larger than most homes or even entire schoolyards. [3][6] For example, if Earth is represented by a small marble, the distance to Jupiter would be hundreds of feet away, and Neptune would stretch for miles. [3] This realization often forces model makers to create two separate models: one focusing on size and another focusing on spacing.
When building a model to show distances accurately, the scale factor is usually quite small, which means the planets themselves become microscopic. [3] If you decide to tackle the distance model, selecting a manageable scale is key. If you know your available space is limited to, say, a 100-foot-long hallway, you can work backward to determine the largest possible scale factor you can use before the planets disappear entirely. [3]
Conversely, a model that focuses purely on size comparison simplifies the distance issue by setting the planets in a fixed, manageable arrangement, often centered around the Sun. In this size-focused approach, you ensure that if the Sun is the size of a basketball, Jupiter is scaled appropriately to be a grapefruit, and Earth is merely a peppercorn. [3][7] This method is generally easier to construct indoors and still teaches relative planetary dimensions effectively. [2]
# Material Choices
The required materials depend entirely on the scale and construction method chosen. For planetary bodies, common choices include Styrofoam balls, crafting foam, or even common household items like marbles or beads if the scale is very small. [2][7] The key is having a variety of sizes ready to match your chosen scaling ratio. [3]
For the Sun, you will need the largest sphere, perhaps a beach ball or a large Styrofoam sphere, depending on how big you want the overall model to look. [7] When painting, acrylic craft paints work well for most materials. [2] You will also need materials to represent the structure holding the planets, such as wooden dowels, sturdy wire, or strong thread for hanging models. [2][7] If you are making a tabletop display, a large piece of sturdy cardboard, poster board, or even plywood can serve as your base, often painted black or dark blue to represent space. [7]
A helpful, often overlooked material is an orbital marker. Instead of just suspending planets on wires, you can use thin fishing line or thin wire to create visible, concentric rings around the Sun to indicate the orbital paths, especially useful if you choose a tabletop layout where true distance representation is impossible. [7]
# Sizing Planets
To ensure your size model is educational, accurate relative sizing is paramount. Since direct measurements for an exact scale are complex, using pre-sized objects or simple ratio calculations based on diameter is the most practical route. [3] For instance, if you assign a specific diameter to Earth—say, one inch—you can calculate the required diameter for Mars, Jupiter, and the others using established ratios. [3]
Here is a simplified comparison based on relative diameters, illustrating the drastic size differences you need to capture:
| Celestial Body | Relative Size Comparison | Modeling Material Suggestion (Conceptual) |
|---|---|---|
| Sun | Massive | Large Beach Ball or Basketball |
| Jupiter | Largest Planet | Large Orange or Grapefruit |
| Saturn | Large | Slightly smaller than Jupiter |
| Uranus / Neptune | Ice Giants | Large Oranges or Plums |
| Earth / Venus | Terrestrial | Marble or large Cherry |
| Mars / Mercury | Small Terrestrial | Peppercorn or large Seed |
| Pluto (Dwarf) | Tiny | Pinhead |
If you are building a model meant to hang, like a mobile, the weight distribution becomes a factor in your construction. The heavy outer planets—Jupiter and Saturn—will require stronger support wires than the inner, lighter planets like Mercury and Mars. [1] You must account for this physical reality when designing the support structure, balancing the mobile correctly, even if you are not trying to model orbital periods. [1]
# Building Methods
Two primary approaches dominate solar system modeling: the hanging mobile and the fixed tabletop layout. Each offers different educational takeaways and construction challenges. [2][6]
# The Hanging Mobile
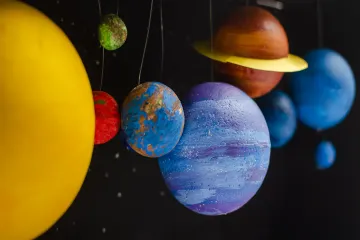
A mobile is perhaps the most visually impressive way to represent the solar system, as the planets appear suspended in space. This method excels at demonstrating that orbits are not strictly on a flat plane; planets orbit at slightly different angles relative to the ecliptic plane. [6] To achieve this, you use different lengths of wire or string extending from a central support structure (often intersecting dowels). [2][7]
When constructing the mobile, start from the center (the Sun) and work outward. Attach the inner planets—Mercury, Venus, Earth, Mars—to the innermost support arms, ensuring their lengths accurately reflect their relative orbital distances within your chosen scale. [2] Then, extend further arms for the asteroid belt, Jupiter, Saturn, Uranus, and Neptune. If you are trying to show the relative distance scale, this method can become unwieldy quickly, as the outermost support arms might need to be many feet long, requiring significant ceiling height or a very large frame. [3][5] An insightful approach for mobiles is to hang the planets not directly beneath their orbital line, but slightly offset, reinforcing the idea that they are not all perfectly aligned in a straight line from a single perspective. [6]
# The Tabletop Layout
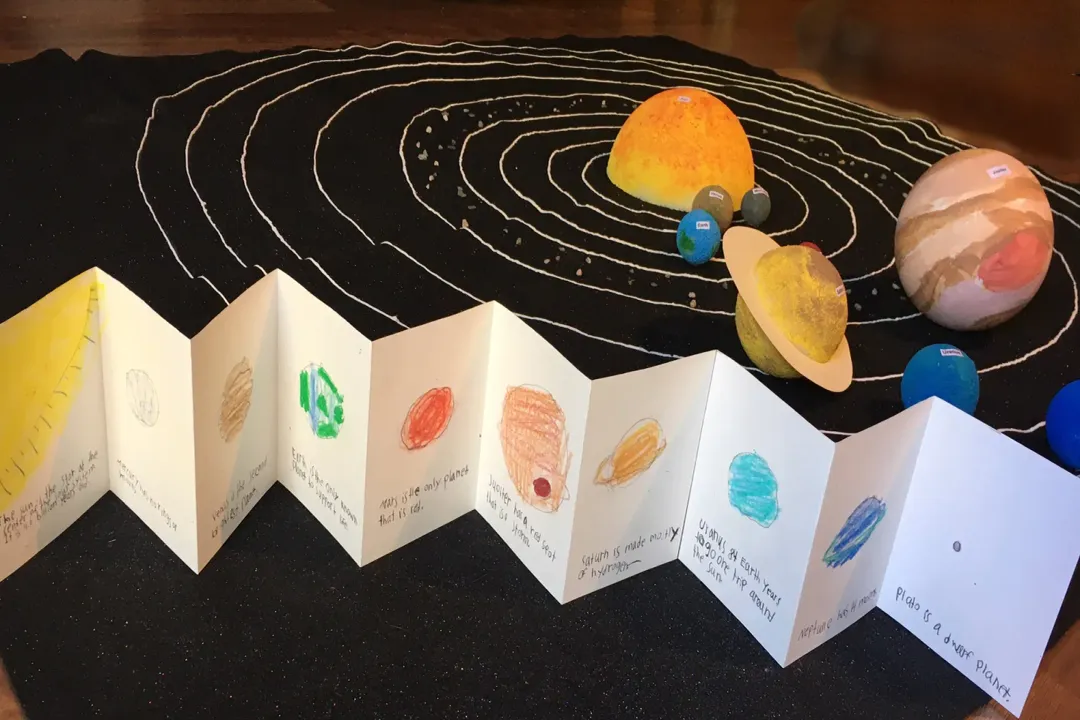
For models focusing on the relative size or a very compressed distance scale, a tabletop or flat board layout is often easier to manage. [7] The base is typically a long strip of dark material representing the plane of the solar system. The planets are mounted on dowels or rigid wire of varying heights to give a 3D effect, or simply affixed flat onto the board. [7]
If you use this method to represent distance, you must use a fixed scale and measure out the positions precisely, marking the distance from the Sun (the center point) for each planet. [3] For instance, if you decide 1 inch on your board equals 1 AU, Earth is 1 inch from the Sun, while Jupiter would need to be placed about 5.2 inches away, and Neptune nearly 30 inches away. [3] A practical tip here is to use a long, straight piece of string anchored at the Sun's center to measure and mark the exact placement for each planet before securing them to the board. This prevents cumulative measurement errors from throwing off the outer planets' positions. [7]
# Finishing Touches
Once the physical structure is sound, the aesthetic details bring the model to life. Painting requires attention to detail to differentiate the worlds.
# Coloring Worlds
The Sun should be vibrant, usually represented in bright yellows, oranges, and reds. [7] The terrestrial planets—Mercury, Venus, Earth, and Mars—are often painted with distinct, familiar colors: gray/brown for Mercury, pale yellow/cloudy white for Venus, blue/green/white for Earth, and rusty red for Mars. [2] The gas giants require more complex coloring. Jupiter needs swirling bands of brown, white, and ochre, while Saturn will have lighter, more uniform bands. [2] Uranus and Neptune are best depicted in shades of pale blue and deep blue, respectively. [7]
# Saturn's Rings
If you include Saturn, the rings require special attention. They should be wide but extremely thin relative to the planet's diameter. Cut a flat disk from thin cardboard, foam core board, or thick paper slightly larger than the planet's diameter. Cut a hole in the center of this disk just large enough for the Saturn sphere to fit snugly. Paint the ring assembly to match the planet's tone, perhaps with some subtle striping, and then slide it onto the sphere before mounting it. [2]
# Labeling and Data Integration
A good model goes beyond just showing where things are; it should convey information. Use small labels or flags near each planet to list its name and perhaps one key piece of data. [7] Since you cannot accurately represent both size and distance simultaneously, this is the perfect place to add context. For example, next to the proportionally small Earth sphere, you can attach a tag that reads: Earth Diameter: ~12,742 km or Earth's Distance (at this scale): . [3]
If you are building a tabletop model that prioritizes size, you could include a small chart next to the model that explains the actual distance scale you ignored. For example: "If this model were accurate in distance, Neptune would be $29$ times further away than Earth is from the Sun in this display". [3] This acknowledges the limitation while still teaching the extreme difference in scale between the inner and outer solar system.
# Addressing Orbital Motion
While a static model cannot show the different orbital periods accurately (how long each planet takes to circle the Sun), you can visually suggest the paths of motion. In a mobile, the differing wire lengths inherently suggest the paths. For a fixed board, drawing faint, concentric ellipses or circles in a light gray or silver paint can represent the orbits. [7]
It is worth noting that while the inner planets orbit relatively close together, the distances between the outer planets are vast. If you successfully scale the distance for the inner four planets onto a kitchen table, you may find that Jupiter falls off the table, Saturn requires a separate room, and Uranus and Neptune would need to be in the neighboring town. [5] This contrast is a powerful teaching moment that can be highlighted by showing the clustered inner orbits versus the widely spaced outer orbits, even if the absolute scale is compressed for practicality. [6] By carefully choosing your construction method and clearly communicating which aspect of scale you prioritized, your model can effectively communicate the wonders of our planetary neighborhood. [2][3]
#Videos
how to make 3d solar system model school project - YouTube
SOLAR SYSTEM PLANETS from Clay | Best School & Home Project
Related Questions
#Citations
how to make 3d solar system model school project - YouTube
How to Build a 3D Solar System Model with Kids
Make a Scale Solar System – Math Project | NASA JPL Education
How can I build a completely accurate solar system model? - Reddit
Solar System Scale Model | PBS LearningMedia
DIY Model of our Solar System - hands-on project for lower el students
Make a scale model of the Solar System and show where the ...