What materials do I need to make a solar system model?
Creating a model of our solar system is a classic educational project, and the materials you gather will largely determine the final look, feel, and longevity of your creation. While the basic concept involves representing the Sun and the eight planets, the exact components you need depend entirely on your desired scale, whether you plan to hang it, or if you are aiming for a stationary, flat display. [3][5]
The very first step in material gathering involves deciding on the size relationship between the planets. If you are focusing on a general representation without strict scaling, common craft items will suffice. [3] However, if the goal is an accurate scale model—even just in planetary diameter—your material list might change drastically. For instance, if you choose a basketball to represent Jupiter, the Earth might end up being smaller than a peppercorn, which presents a significant challenge for standard craft supplies. [2] This decision—scale versus aesthetics—will guide every subsequent material choice.
# Celestial Spheres
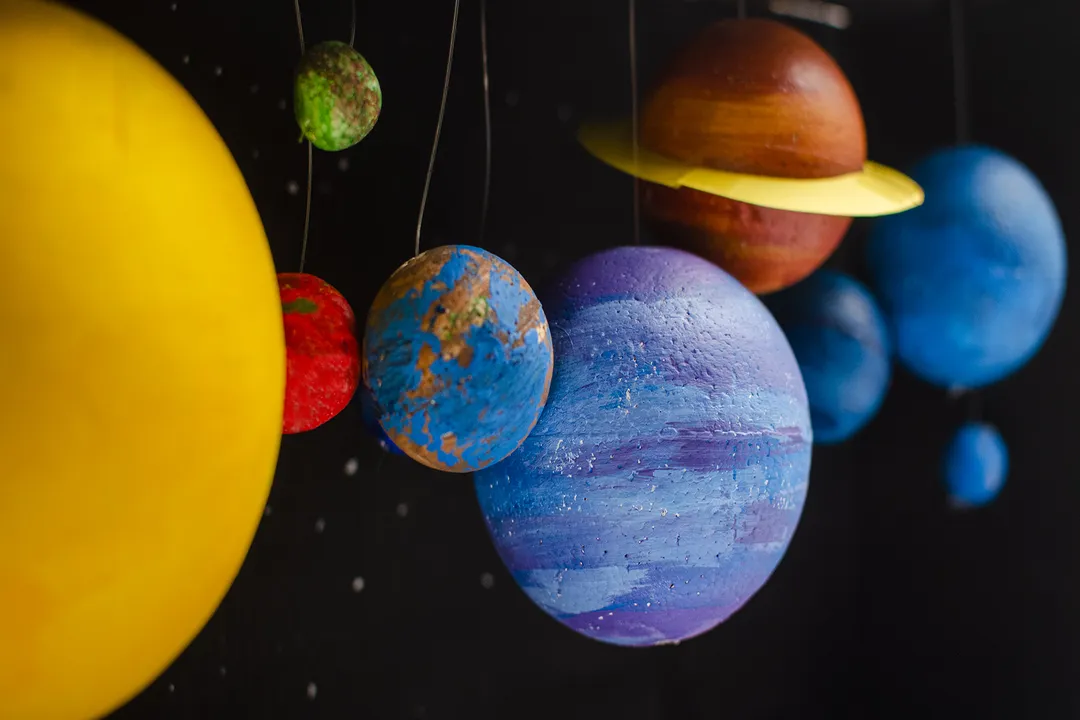
The heart of any solar system model is, naturally, the spheres representing the Sun and the planets. Your options here range from pre-formed shapes to materials you sculpt yourself. [3]
For beginners or younger students, Styrofoam balls are a frequent recommendation because they are lightweight and easy to handle. [1][3] They can be easily pierced for stringing or mounting on dowels. [1] You will need various sizes to approximate the relative scale, remembering that the Sun will be significantly larger than anything else, followed by Jupiter and Saturn, then Uranus and Neptune, with Earth and Venus being much smaller, and Mercury and Mars being the tiniest of the major bodies. [2] If you aren't worried about precise relative size, a simple set of assorted foam balls will work just fine. [5]
Another excellent option, particularly if you need a very specific size or want a heavier, more solid feel, is air-dry clay or polymer clay. [3] Clay allows for excellent customization; you can sculpt subtle surface details or ensure precise proportions if you have calculated them beforehand. [3] A potential downside is that clay can become heavy quickly, which necessitates stronger structural support later on. [2]
If speed and simplicity are paramount, some projects suggest using found objects. [1] This could mean using things like marbles, different sized rubber balls, or even craft pom-poms for the smaller outer planets. [1][5] For a very quick, edible model, one might use fruits or candies, though this is obviously not a permanent solution. [1]
Considering the Sun itself, it needs to be the largest object. If you are working on a model that needs to be impressive, using a large beach ball or a very large Styrofoam sphere might be necessary. [3]
# Building Structure

Once you have your planets, you need a way to position them in space relative to each other and the Sun. The materials required for this depend heavily on whether you are making a mobile (hanging) or a stationary (diorama/board) model. [3][8]
# Hanging Designs
For models intended to float or hang, rigidity and balance are key. [1]
- Wire or Hangers: Sturdy metal coat hangers or thick craft wire are excellent for creating the framework of a mobile. You can bend the wire into arms extending from a central point or use it to create horizontal supports from which the planets will dangle. [1][5]
- String or Fishing Line: Thin, strong cord is needed to suspend the planets from the structural arms. [1] Fishing line is often preferred because it is nearly invisible, giving the illusion that the planets are floating in space. [5]
- Dowels or Sticks: Wooden dowels or even strong bamboo skewers can serve as the main structural "arms" extending from the Sun, though these usually require careful balancing if they are supporting heavy spheres. [3]
# Stationary Displays
If your model will rest on a flat surface, the structural materials shift toward a base.
- Base Material: A large piece of foam board, sturdy cardboard, or even a painted wooden plank makes a good foundation. [3][5] This base represents the plane of the solar system.
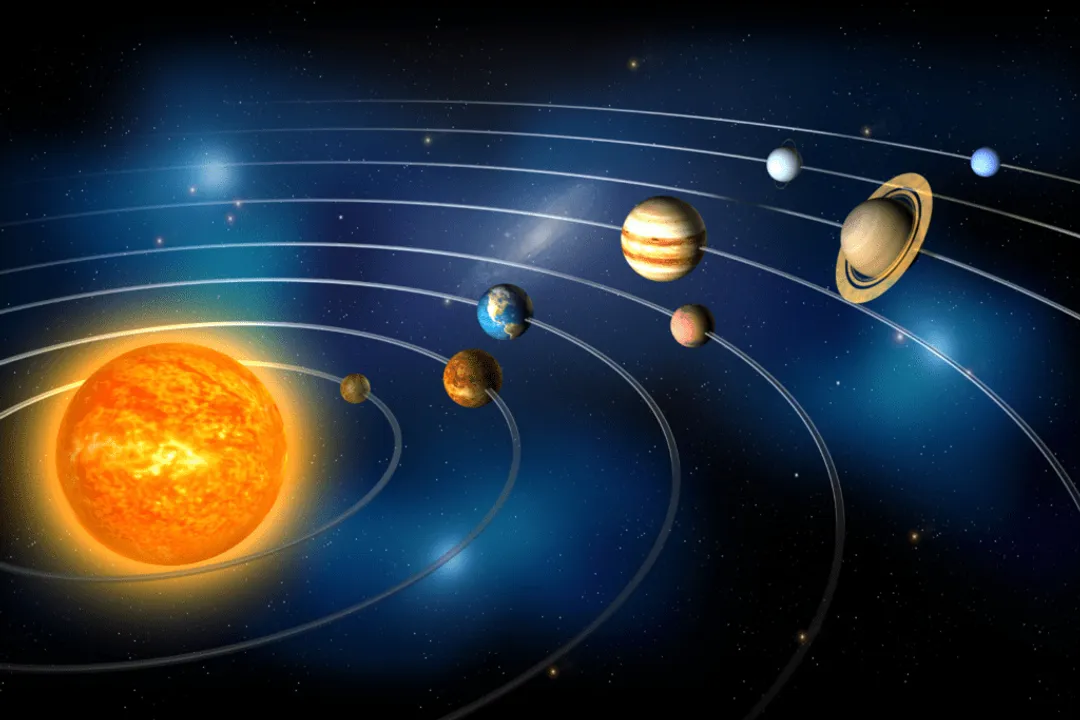
- Mounting Rods: Dowels or stiff wire are driven into the base to hold the planets at varying heights or distances from the central Sun. [3] For models emphasizing distance, you might use progressively longer dowels extending outward from the center point. [2]
When assembling any structure, especially a hanging mobile, keep the weight distribution in mind. Lightweight Styrofoam planets paired with thin wire supports are much easier to balance than heavy clay planets suspended by thread. [2] It is often helpful to pre-weigh your finished planets before cutting your structural supports, allowing you to design the necessary counterbalances right away, rather than realizing halfway through that one side of your mobile is sagging due to Jupiter’s unexpected heft.

# Color Finish
To make the planets recognizable, they need paint. This stage demands acrylic paints, as they adhere well to foam, wood, and clay. [3][5]
You will need a basic palette: white, black, yellow, red, and blue are essential starting points for mixing the colors of the various worlds. [3] For instance, Earth requires blues and greens, while Mars needs various shades of red and orange-brown.
Beyond just color, look for materials that add texture or specific features:
- Saturn's Rings: This is a classic detail requiring a separate material. Thin cardboard, craft foam sheets, or even stiff plastic packaging can be cut into a ring shape, painted, and slipped around the planet's equator. [3][5]
- Surface Detail: Fine-grit sandpaper can lightly scuff Styrofoam to give it a more textured, less perfectly smooth look before painting. [1] For gas giants, using a dry-brush technique with acrylics can help mimic cloud bands on Jupiter or Neptune. [3]
For the Sun, using bright yellows, oranges, and perhaps some red can capture its fiery appearance. If you are aiming for a more scientific representation rather than just a bright ball, research suggests that solar features are often represented with yellows and whites against a darker background, though this is less common for general school projects. [2]
# Detailing the Worlds
Accurate representation requires more than just color; it demands paying attention to unique features. While the sources provide general guidance, understanding which materials excel for which planet adds significant value to the building process.
| Planet | Suggested Material Focus | Key Visual Feature to Capture | Source Focus |
|---|---|---|---|
| Mercury/Mars | Solid clay or dense foam for impact craters. | Red/brown hues for Mars; grey/cratered for Mercury. | General craft application [3] |
| Venus/Earth | Smooth surfaces, possibly slightly textured for Earth's continents. | Blue/white for Earth, hazy yellows/oranges for Venus. | Visual representation [1][5] |
| Jupiter/Saturn | Largest spheres; emphasis on banding/rings. | Prominent, swirling stripes on Jupiter. | Visual demonstration [1][2] |
| Uranus/Neptune | Lighter, cooler colors. | Pale blue/cyan for an icy look. | Color palettes [3] |
If you are working with a very large model where the Sun and Jupiter dominate the material budget, consider using a simpler, lighter material like painted paper maché for the smaller, outer planets to save on weight and cost, contrasting the heavy foam or clay used for the inner, more detailed worlds. [5] A practical consideration for projects involving true relative distance scaling, even if diameter is ignored, is the mounting method: if your model spans a 20-foot room, thin wire won't work; you'll need rigid PVC piping or metal rods anchored to a large wall or ceiling mount.
# Final Touches and Presentation Materials
The presentation materials transform your collection of spheres and wires into a finished project. These are often overlooked but essential for the final display. [8]
- Labels and Planet Names: Small pieces of cardstock or white paper cut into neat tags are necessary for labeling each celestial body. [3] You can use a fine-tipped permanent marker for clear text.
- Orbital Paths (Optional): If you are making a flat model or want to illustrate orbits on a hanging one, you can use thin white paint or white yarn/thread to mark the paths around the Sun. [5]
- Varnish or Sealant: Once all the paint is dry, applying a clear coat of acrylic sealant—either matte or gloss—can protect your hard work from smudges and dust, which is especially important for Styrofoam models that can easily flake. [1]
Gathering your materials is more than just ticking off a list; it’s about preparing for the specific challenges of size, weight, and visual accuracy that your chosen model style presents. [2] By comparing the lightweight ease of foam against the sculptability of clay, you can select the perfect components for your cosmic creation. [3]
#Videos
How to make a solar system model - YouTube
How to make a Spinning 3D Solar System Model | High School Project
Related Questions
#Citations
How to make a solar system model - YouTube
Make a Scale Solar System – Math Project | NASA JPL Education
Solar System Model Project For School | Science Explorers
How to Build a 3D Solar System Model with Kids
2nd grader needs to construct own Solar System model. Ideas ...
What's your budget for materials? The size of the galaxy idea. - Reddit
Make a Model of the Solar System | Lesson Plan - Science Buddies
How to Make a Solar System Model (with Pictures) - wikiHow