What is the best ISO setting for the Milky Way?
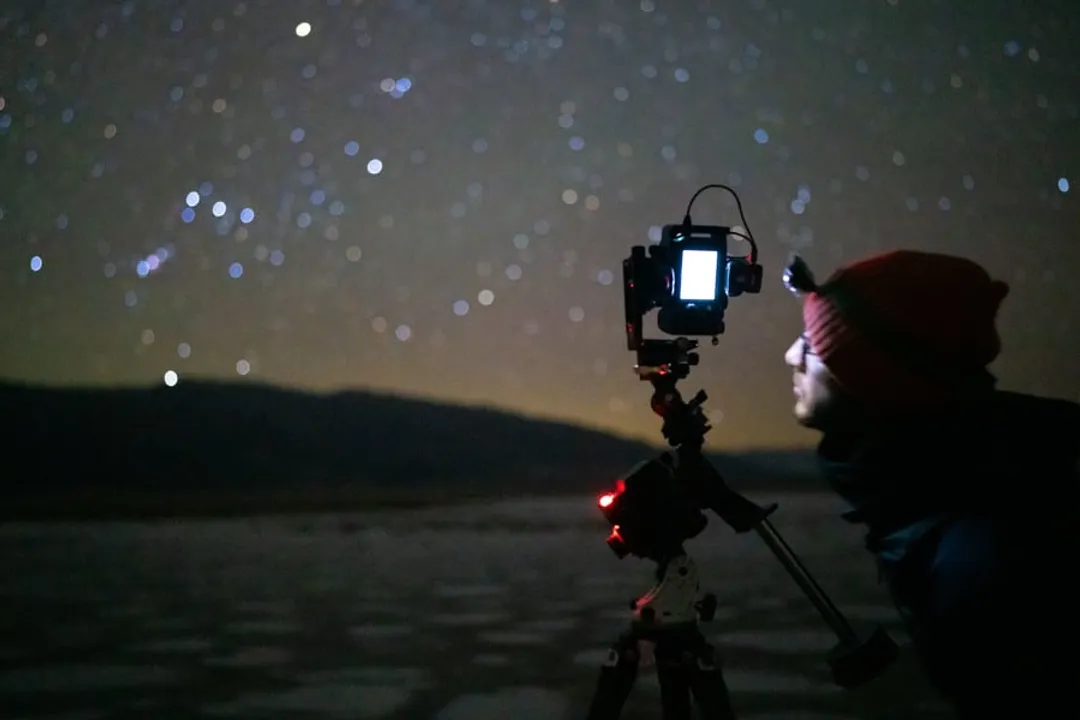
Capturing the ethereal glow of the Milky Way requires pushing your camera’s capabilities far beyond what’s needed for a sunset snapshot. The light from distant stars is incredibly faint, forcing photographers to compensate by maximizing the light gathered in the shortest time possible, which brings the ISO setting front and center in the discussion. [2][5] There isn't a single magic number that applies universally, as the "best" ISO is a dynamic result of balancing light acquisition with manageable digital noise, heavily influenced by your specific camera body and the quality of the night sky you are shooting under. [1][3]
# Starting ISO Points
For most modern full-frame cameras shooting the core of the Milky Way, a starting point often falls between ISO 3200 and ISO 6400. [1][5] For cameras with smaller sensors, like APS-C models, users might need to venture higher, perhaps between ISO 3200 and ISO 12800, depending on the lens speed and the specific camera's high-ISO performance. [1][5] If you are shooting with an older DSLR or a camera known for producing noticeable noise at higher sensitivities, you might anchor closer to ISO 1600 or 3200 and compensate by using the widest possible aperture and the longest acceptable shutter speed. [4] The key concept here is sensitivity: you want the sensor to be just sensitive enough to capture the light within the time limit imposed by the Earth’s rotation, but not so sensitive that the electronic noise overwhelms the subtle details of the galaxy. [5]
# Exposure Triangle Context
ISO cannot be discussed in a vacuum; it is one leg of the exposure triangle, and in Milky Way photography, the other two legs—aperture and shutter speed—are typically set first to maximize light capture. [2][3] Your aperture should almost always be set to its widest opening, meaning the lowest f-number your lens offers, such as f/2.8, f/1.8, or even f/1.4 if you have a fast prime lens. [2][3][6] This maximizes the light hitting the sensor in any given moment.
Once the aperture is fixed wide open, the shutter speed is dictated by the need to prevent stars from appearing as streaks due to the Earth's movement—a phenomenon known as star trailing. [3][5] The commonly cited guideline for this is the 500 Rule, where you divide 500 by your focal length to find the maximum shutter speed in seconds for acceptable pinpoint stars. [3][5] For example, on a full-frame camera using a 24mm lens, seconds, suggesting a maximum exposure time of about 20 seconds. [3] If you are using an APS-C sensor, you must account for the crop factor, making the effective focal length longer and thus requiring a shorter shutter speed to avoid trailing. [5]
The ISO setting is the final variable adjusted after aperture and shutter speed are determined based on lens speed and the 500 Rule. [5] It becomes the tool you dial up or down to achieve a well-exposed histogram—one that captures the faint detail without blowing out the few brighter foreground elements or clipping the shadows too heavily. [2]

# Sensor Size Impact
The physical size of your camera's sensor plays a significant role in how much noise you generate at a high ISO setting. [5] Generally, larger sensors, such as those found in full-frame cameras, have larger photosites (pixels) which can capture more light individually and are better at rejecting thermal and electronic noise than the smaller photosites on an APS-C or Micro Four Thirds sensor. [5] This means a full-frame shooter might achieve a clean image at ISO 6400, where an APS-C user might find that same setting too noisy, forcing them to choose ISO 3200 and perhaps sacrifice a little brightness. [1]
When comparing different cameras, rather than just looking at the manufacturer's "base ISO" or "native ISO," it is crucial to perform field tests to understand where your camera's acceptable noise threshold lies. [5] A practical approach is to shoot the same dark area of the sky at increasing ISO levels (e.g., 1600, 3200, 6400, 12800) using the same wide aperture and a constant shutter speed dictated by the 500 Rule. Reviewing the resulting files at 100% magnification will clearly show you the point where detail loss due to noise reduction processing or actual noise artifacts becomes visually distracting in the context of your intended final print or display size. [5]
# Calculating Optimal Exposure Time
While the 500 Rule is a useful starting point, it is sometimes too conservative, particularly with newer cameras that are very good at rendering pinpoint stars even at slightly longer exposures, or when shooting at wider focal lengths like 14mm. [3] For a 14mm lens on a full-frame camera, seconds, which is often achievable. However, some photographers prefer to use the newer NPF Rule for more precise calculations, though it requires knowing more specific data about the lens and sensor, making it slightly more complex for beginners. [3]
Here is a small breakdown of how different focal lengths influence your required ISO, assuming a modern full-frame camera shooting at an f/2.8 aperture, aiming for a result comparable to what might be achieved at ISO 3200:
| Focal Length (mm) | Max Shutter Speed (500 Rule) | Implied ISO Adjustment (Relative to 3200) |
|---|---|---|
| 14mm | ~35 seconds | Maintain ISO 3200, gain light via longer exposure |
| 24mm | ~20 seconds | Maintain ISO 3200 |
| 35mm | ~14 seconds | Increase ISO slightly or accept dimmer result |
| 50mm | ~10 seconds | Increase ISO more significantly |
This table illustrates an important trade-off: using a wider lens (like 14mm) allows you to keep the ISO lower (e.g., ISO 3200) because you can expose for longer (35 seconds) before trailing occurs, capturing more total light. [2] If you are forced to use a longer lens (like 50mm), you must shorten the exposure (10 seconds), which requires boosting the ISO higher (potentially 6400 or more) to achieve the same overall brightness. [2]
# Light Pollution Mitigation
The environment plays a significant role in determining your final ISO choice, irrespective of the general recommendations. [6] If you are under pristine, dark skies—perhaps a Bortle Class 1 or 2 area—you have the luxury of keeping your ISO lower, perhaps settling on ISO 3200 or even ISO 1600, knowing that the faint details of the galactic core are all you need to capture. [6] This low ISO will result in cleaner images with less inherent noise, requiring less aggressive noise reduction in post-processing. [5]
Conversely, if you are shooting from a location with noticeable light pollution, such as a Bortle Class 4 or 5 area near a town, you might be forced to increase your ISO significantly, maybe to 6400 or even 12800, just to gather enough light before the sky background becomes overwhelmingly bright or too noisy from the combined skyglow and sensor noise. [1][6] In these compromised conditions, a significant amount of the light you capture is actually unwanted light pollution, and aggressive post-processing (using specialized stacking techniques or light pollution removal tools) becomes essential to salvage the Milky Way detail. [6]
It is worth noting that one common mistake among beginners is setting the ISO too low initially, resulting in an image that appears completely black on the camera's small LCD screen, leading them to incorrectly believe they need a longer shutter speed—which then results in star trailing. [4] Always check your histogram after an initial shot at a high ISO like 3200 to ensure you have some signal captured before trying to lengthen the exposure time. [4]
# Post-Processing Decisions
The final setting you choose for ISO should always be viewed through the lens of what you plan to do with the image afterward. [1] If the photo is intended only for small social media sharing where high noise is naturally compressed and hidden, you can afford to push the ISO higher, perhaps to 12800, accepting a noisier file in exchange for a brighter raw image that captures more of the faint nebula structures. [1]
However, if you intend to create a large print—say, 24x36 inches or larger—the slightest hint of noise that was acceptable on a computer screen can become jarringly obvious when magnified. [1] For large prints, prioritizing cleaner data by selecting the highest ISO that keeps noise barely visible at 100% magnification (often ISO 3200 or 6400, depending on the camera) is the superior strategy. [5] Post-processing software today, especially dedicated stacking programs that combine multiple exposures, is exceptionally good at reducing noise, but it can only work with the light data that you actually captured. [5]
If you are stacking multiple exposures (e.g., 10 to 20 identical shots), you can afford to shoot at a slightly lower base ISO—perhaps ISO 1600 or 3200—because the subsequent stacking process effectively cancels out random noise in the final combined image, leading to a much cleaner result than a single exposure at a much higher ISO. [5] This stacking approach is arguably the single best way to increase image quality while maintaining control over noise, as it effectively lowers the effective ISO while increasing the signal-to-noise ratio. [5]
# Actionable Testing Protocol
To move past generalized advice and truly determine the best ISO for your specific gear under your typical dark sky conditions, follow a short testing routine. First, set your lens to its widest aperture and lock your shutter speed based on the 500 Rule for your widest lens (e.g., 20 seconds for a 24mm lens). [3] Find a patch of deep black sky or a very dark foreground object. Take identical test shots starting at a moderate high ISO, such as ISO 3200. [5]
Then, increment the ISO by one full stop for each subsequent shot: ISO 3200, ISO 6400, ISO 12800, and so on. [5] Import these RAW files into your computer and zoom in to 100% view. Compare the images side-by-side. Look not just at the grain, but at the texture and color of the noise. A good ISO is one where the image is bright enough to define the Milky Way, but the background remains relatively smooth and dark, with minimal color splotches. [1] This empirical testing beats any quoted number, as it directly assesses your hardware's actual performance in the field. [5]
For instance, if you find that ISO 6400 is bright but has muddy shadows, but ISO 3200 is clean but requires aggressive brightening in post that introduces a new kind of digital artifact, then perhaps your real sweet spot is slightly above 3200, maybe ISO 4000 or 4500, if your camera allows for third-stop adjustments—this intermediate setting might provide the perfect compromise between light gathering and noise control that a standard full-stop jump misses. [4] This fine-tuning is what separates good images from great ones, as it acknowledges that the noise profile isn't perfectly linear between manufacturers' set stops. [4]
#Videos
Which ISO setting is best for Milky Way Photography? | Two Minute Tip
#Citations
What ISO is good for the milky way? : r/AskAstrophotography - Reddit
Mastering Milky Way photography settings: a comprehensive guide
How to Photograph the Milky Way - A Detailed Guide for Beginners
Can I image the Milky Way with high ISO and 30s exposure?
ISO and Astrophotography | The Best Settings for a Clean Shot
How to Photograph the Milky Way + 2026 Viewing Chart!
Which ISO setting is best for Milky Way Photography? | Two Minute Tip
Photographing the Milky Way - Lewis Kemper Photography
How to set exposure for photographing the milky way?